User Guide
From the GPS speedometer and ODO/TRIP tracking to fuel management, carburetor tuning records, oil change records, and maintenance records — here's what each of the 5 tabs can do, with screenshots.
Cars
Start by registering your car in the Cars tab. You can register multiple vehicles and switch between them — trip logs, fuel records, tuning records, and maintenance records are all kept independently per vehicle.
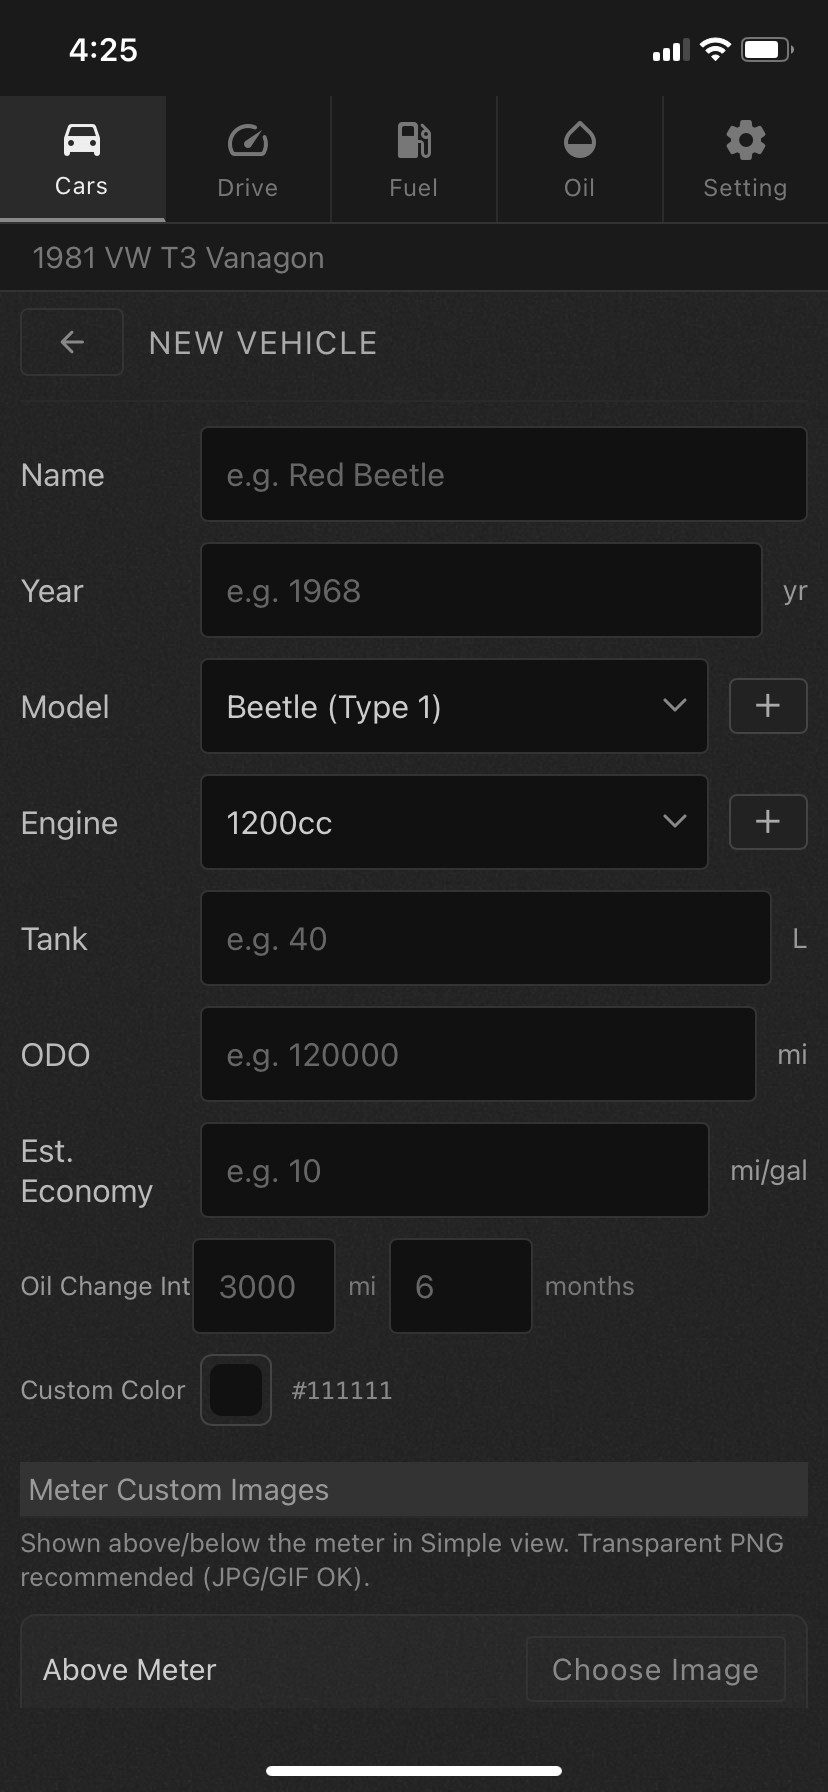
Open the registration screen from “+ Add Vehicle” in the vehicle list. Enter a name and year, and choose the model/engine from the dropdowns — if your car isn't listed, tap “+” to add it on the spot.

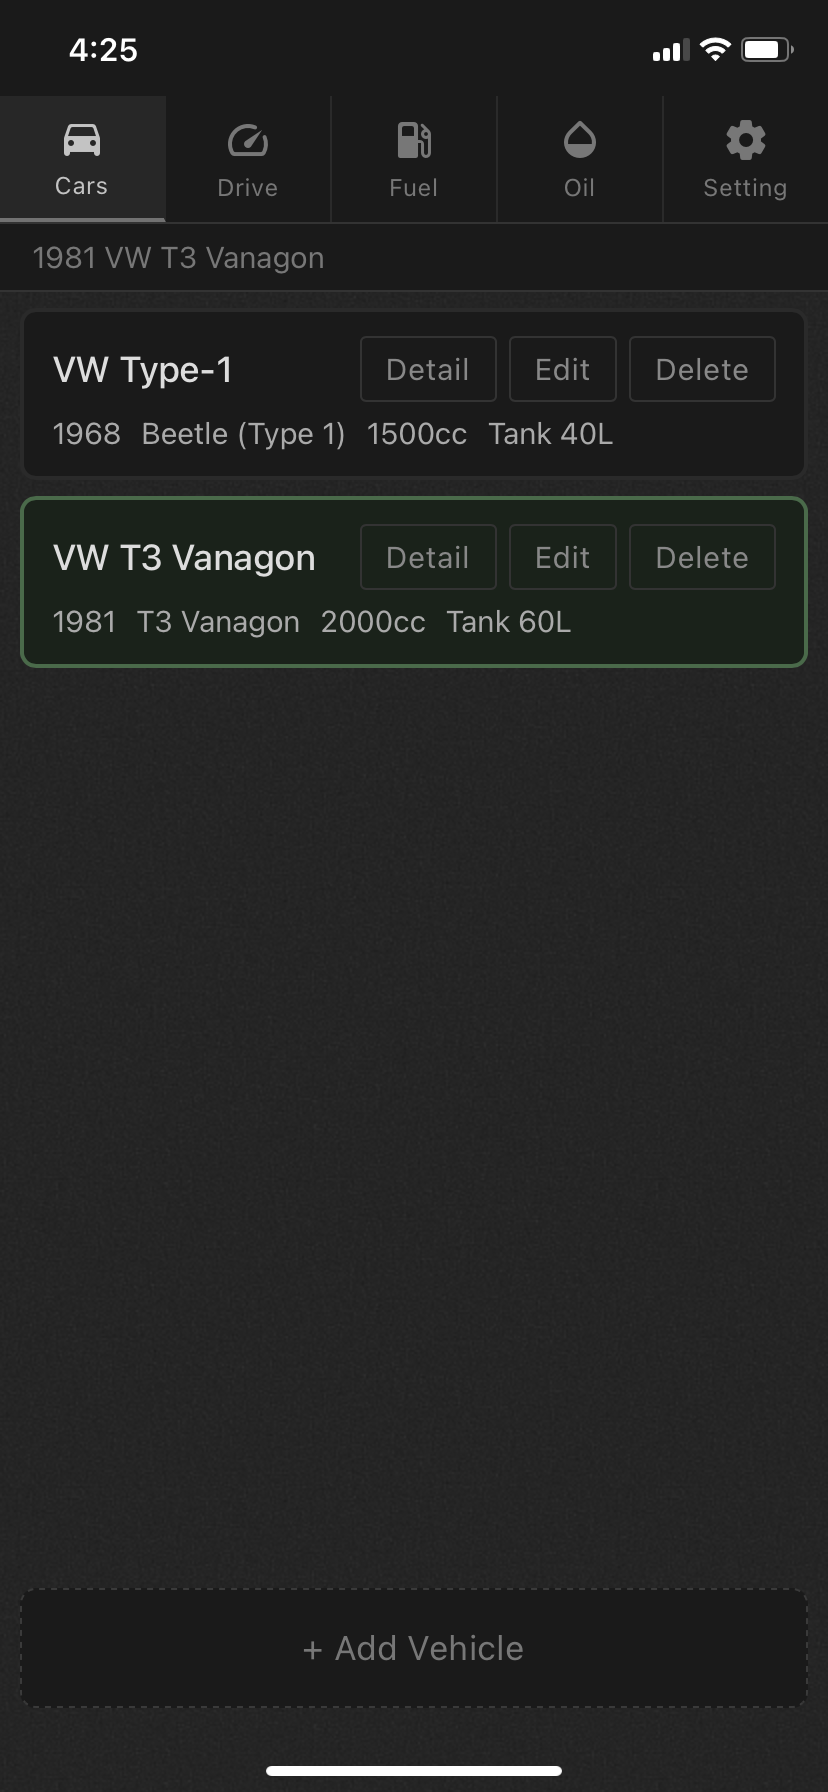
Cars tab: vehicle list

New registration form
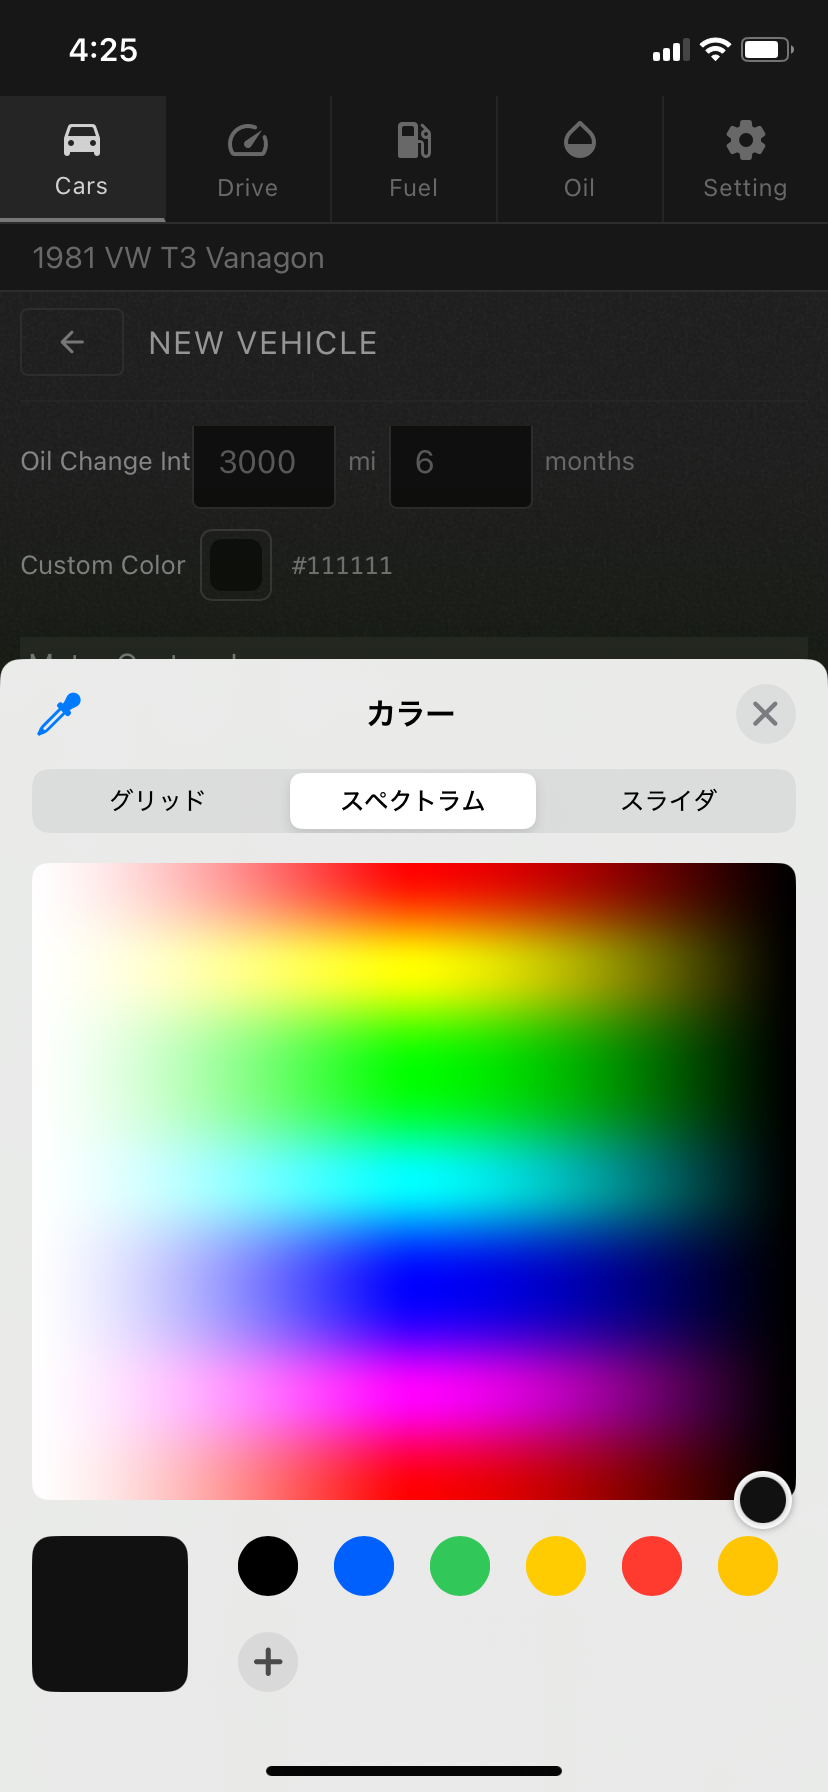
Match the speedometer's background color to your car's interior. Just pick a color from the color picker in the registration form, and it's reflected on the Drive screen.

Custom color setting
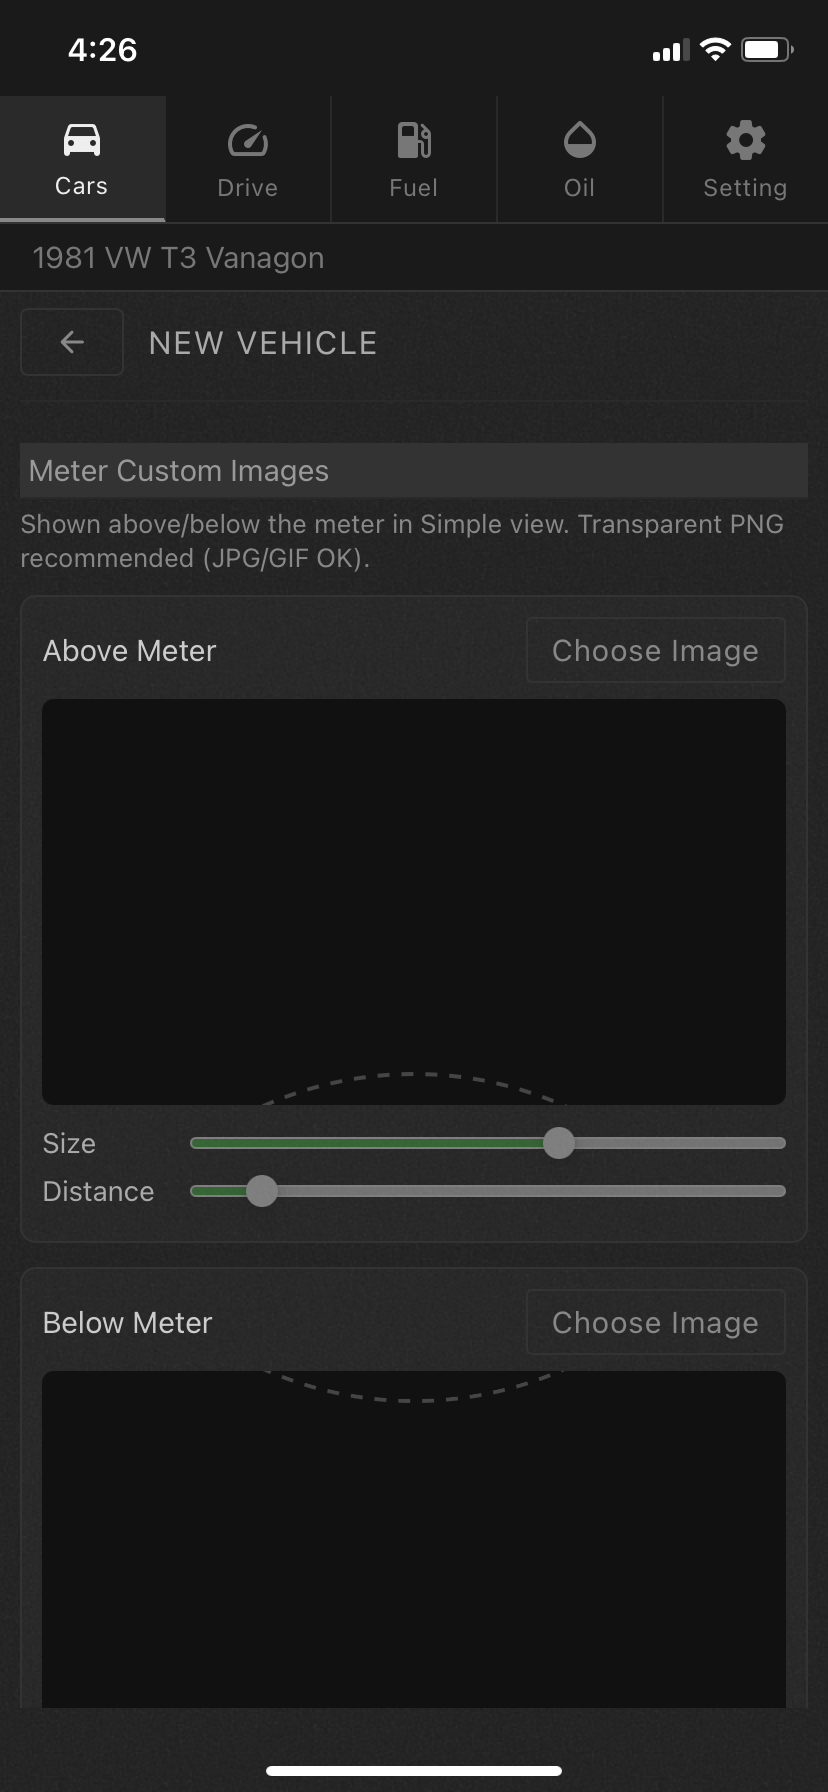
In simple (immersive) display, you can place your own image above and below the meter. Transparent PNGs work best for emblems or logos. Adjust size and distance (position from the meter) with the sliders.

Meter custom image
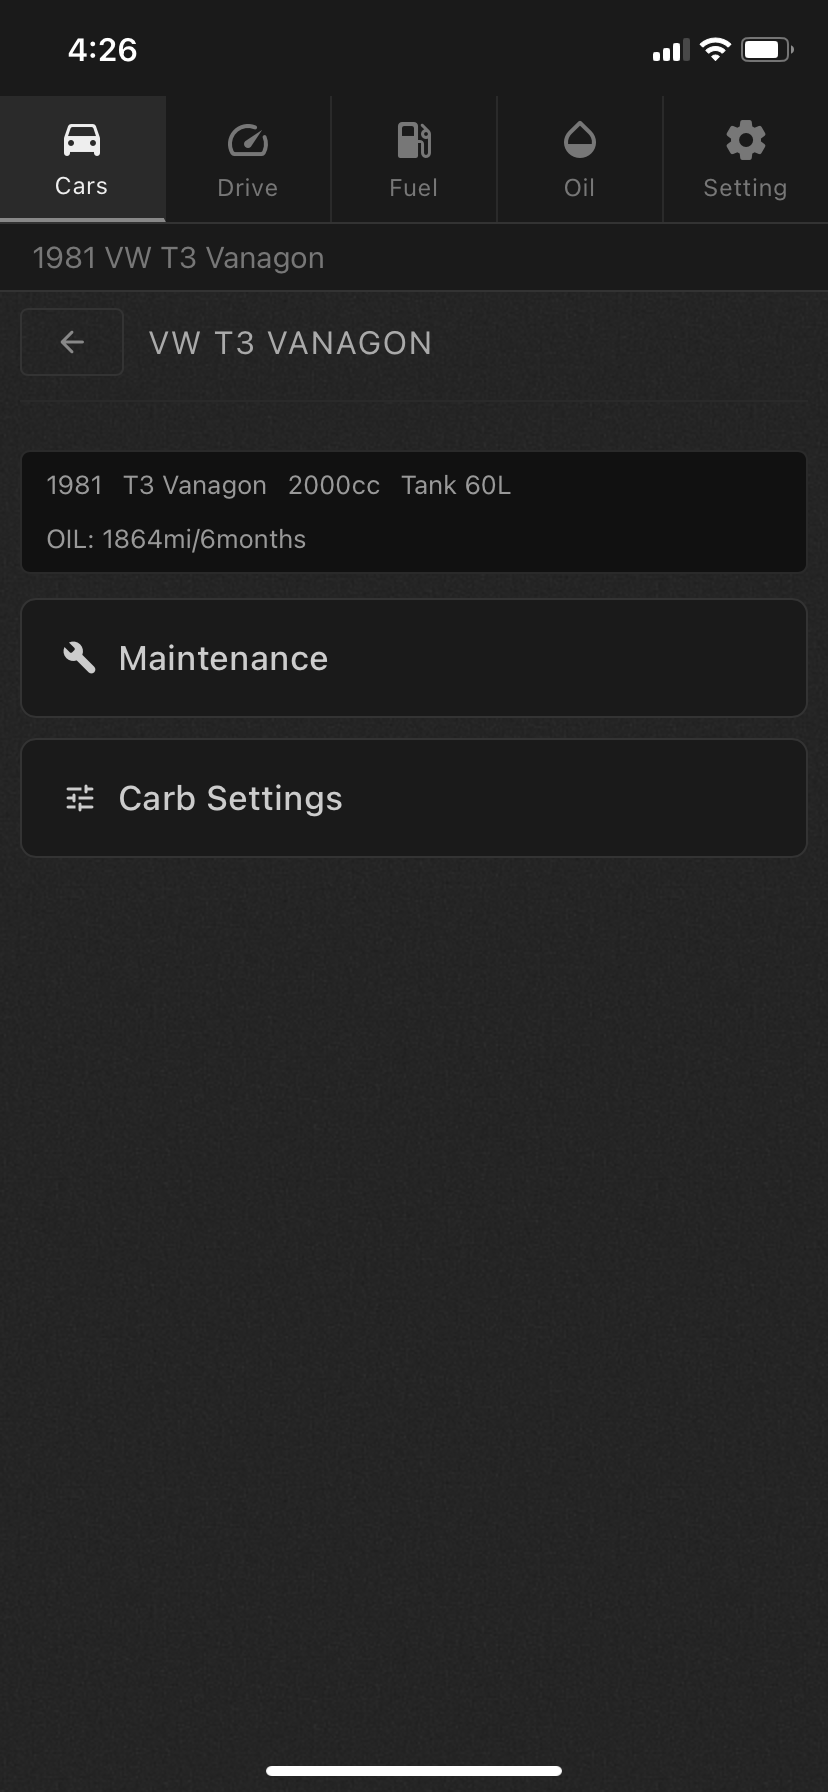
Tap a vehicle in the list to open its detail screen, where you'll find entry points for “Maintenance” and “Tuning Records.” From here you can view and add records specific to that vehicle.

Vehicle detail screen
Maintenance
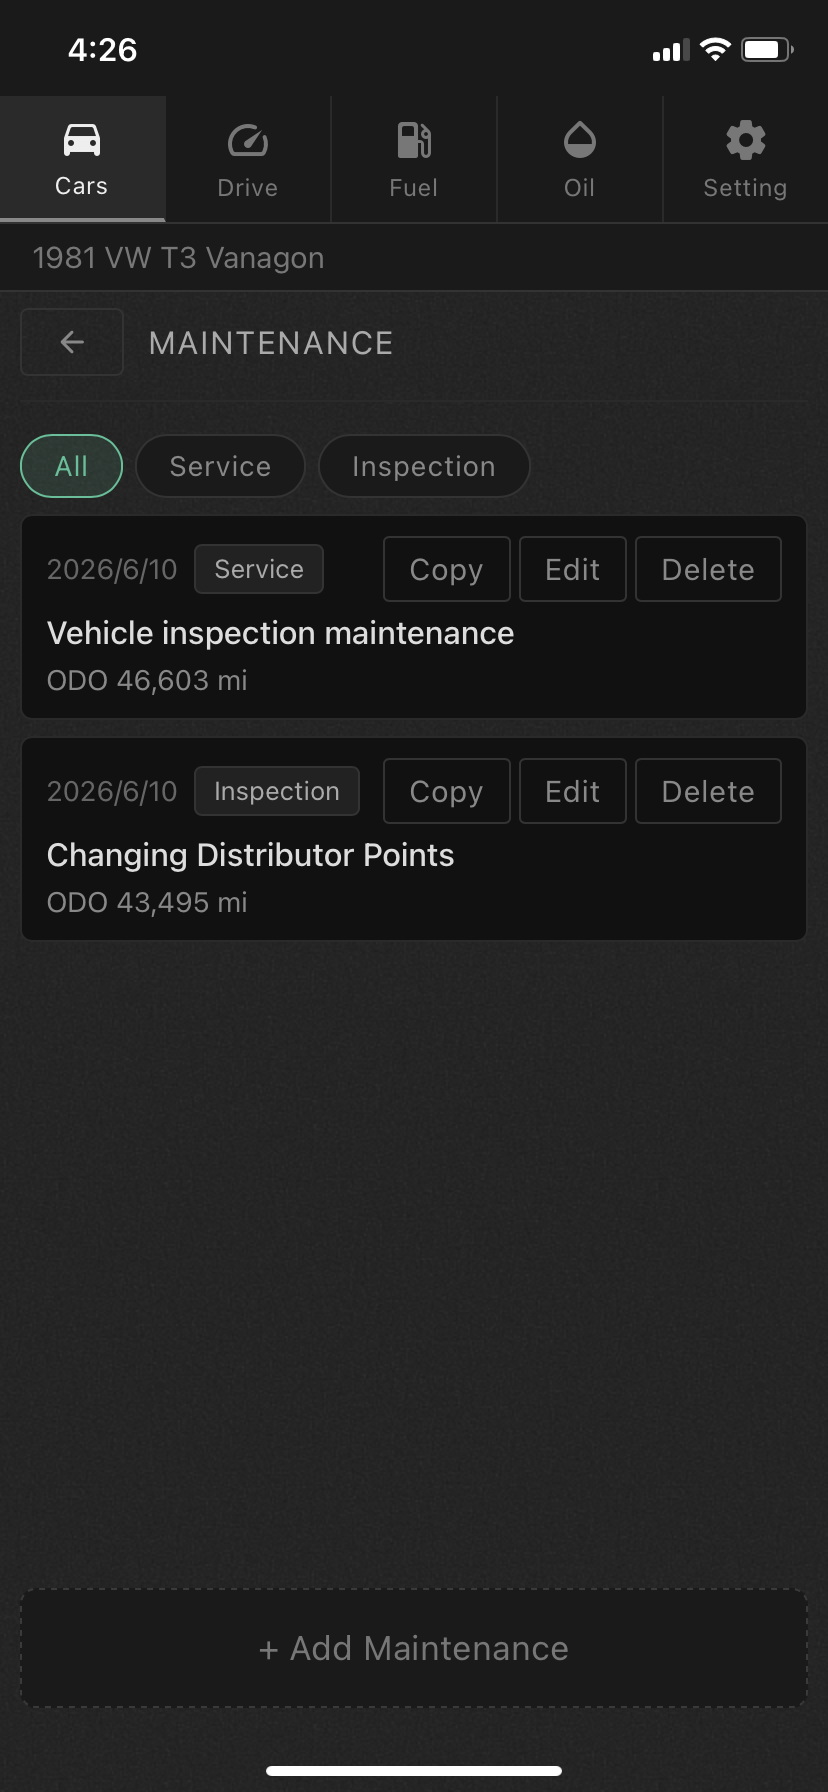
Keep a complete log of inspections, repairs, and servicing. Quickly check things like “When did I last change the tires?” or “When was the last inspection?” Access it from “Maintenance” on the vehicle detail screen.
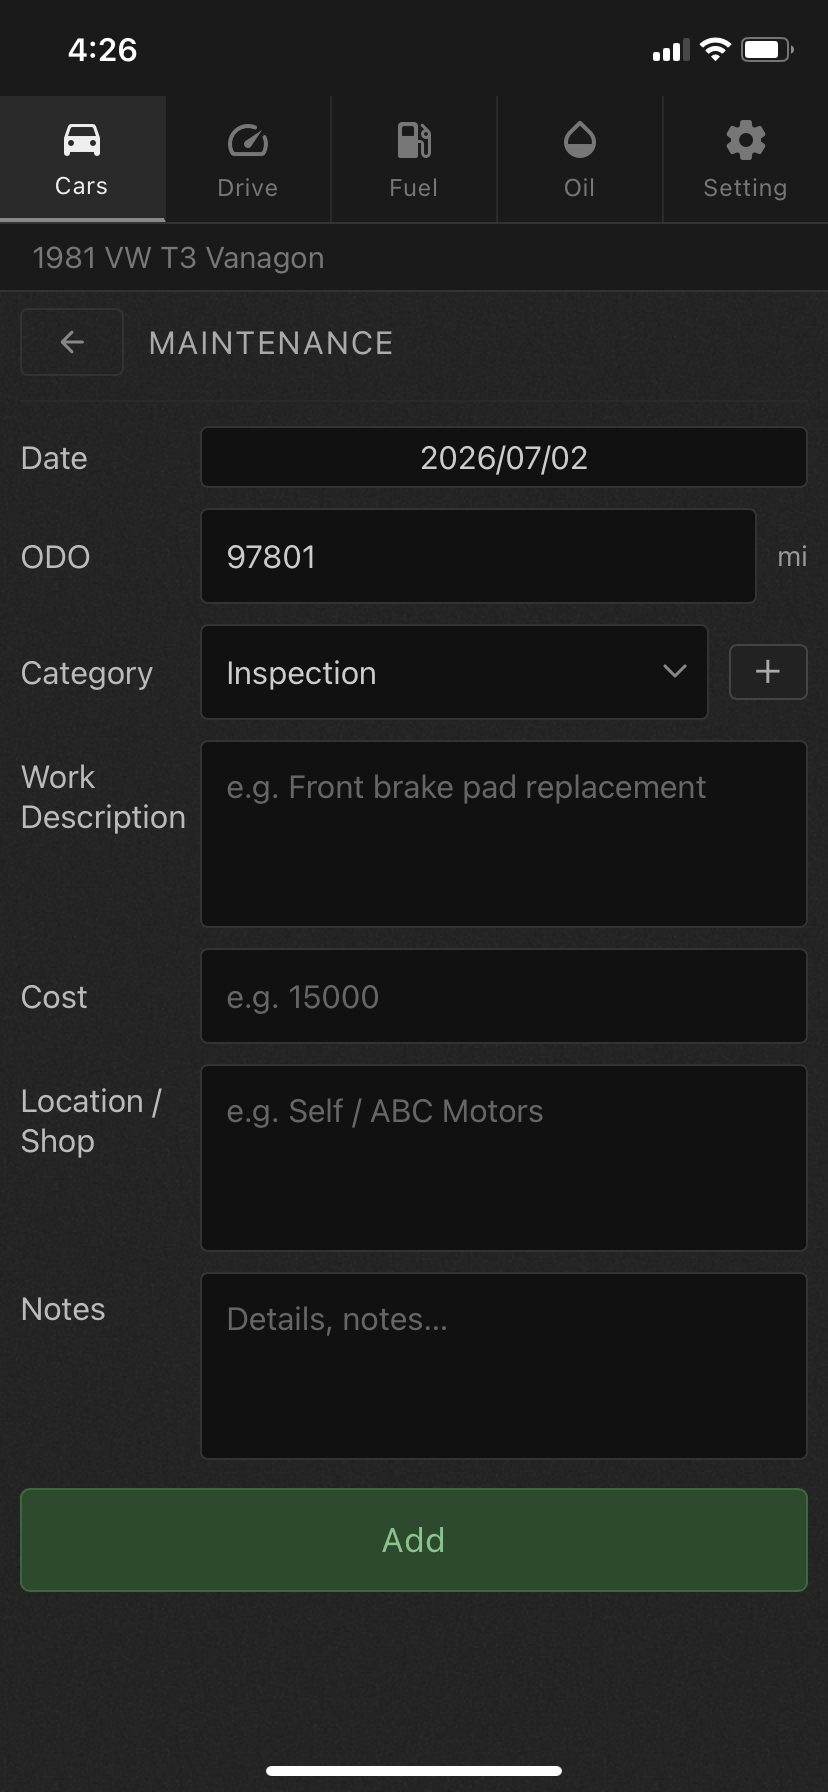
Record the date, mileage, category (choose from the dropdown, or add a new one with “+”), work description, cost, shop, and notes. You can also filter the list by category.

Maintenance list

Maintenance form
Setting Record
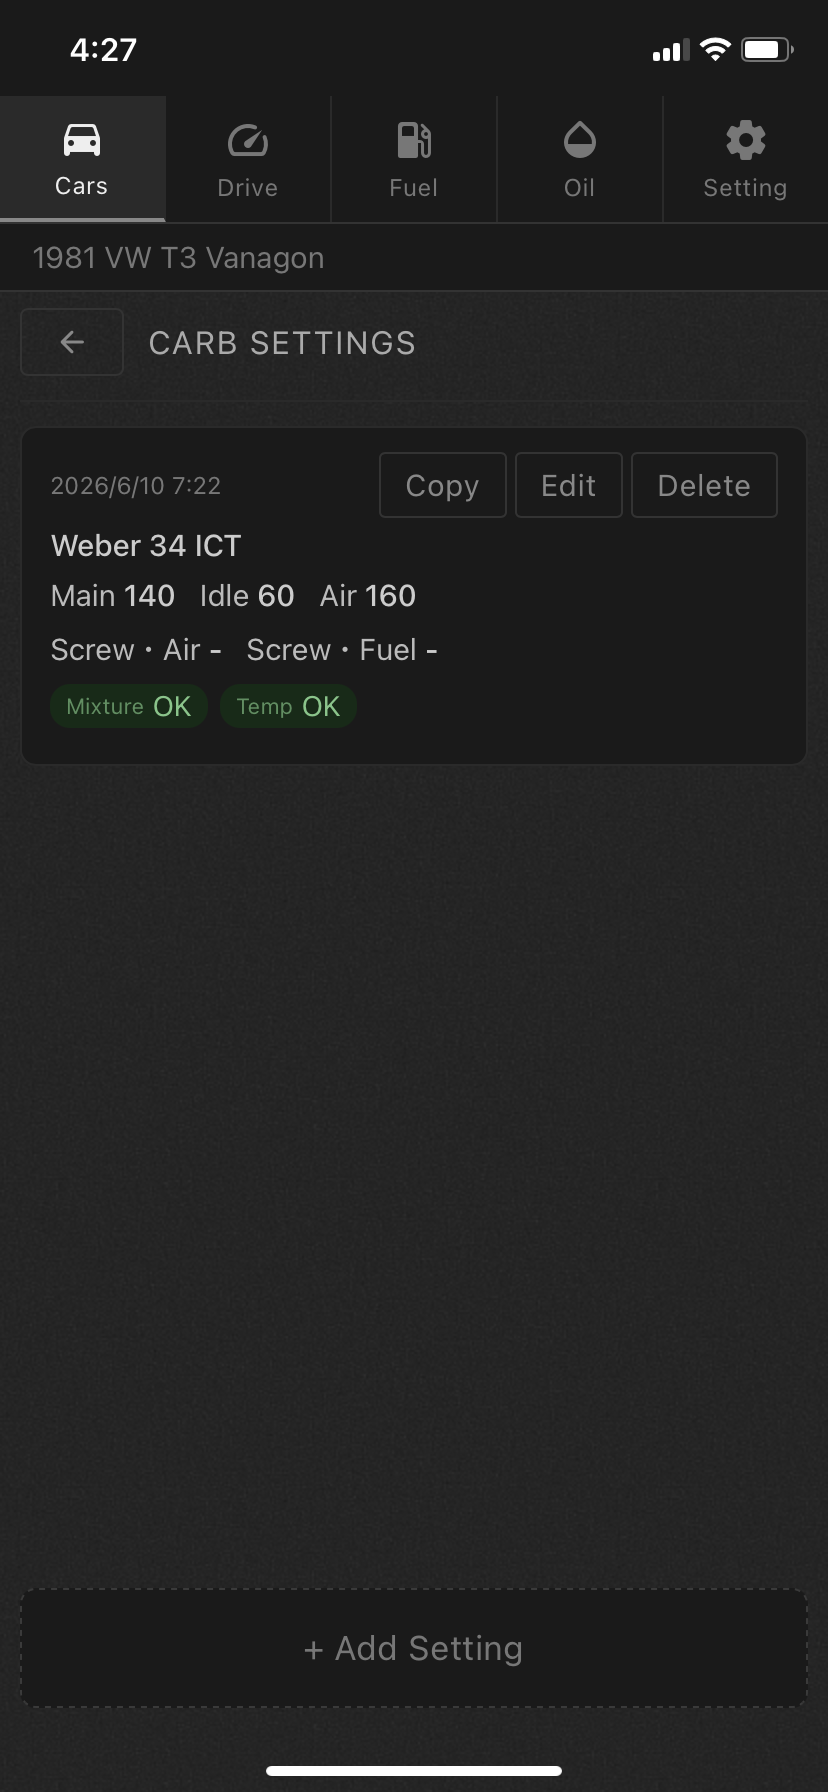
From “Tuning Records” on the vehicle detail screen, log your carburetor adjustments. Keeping before/after data means you can instantly return to the setup that worked best.
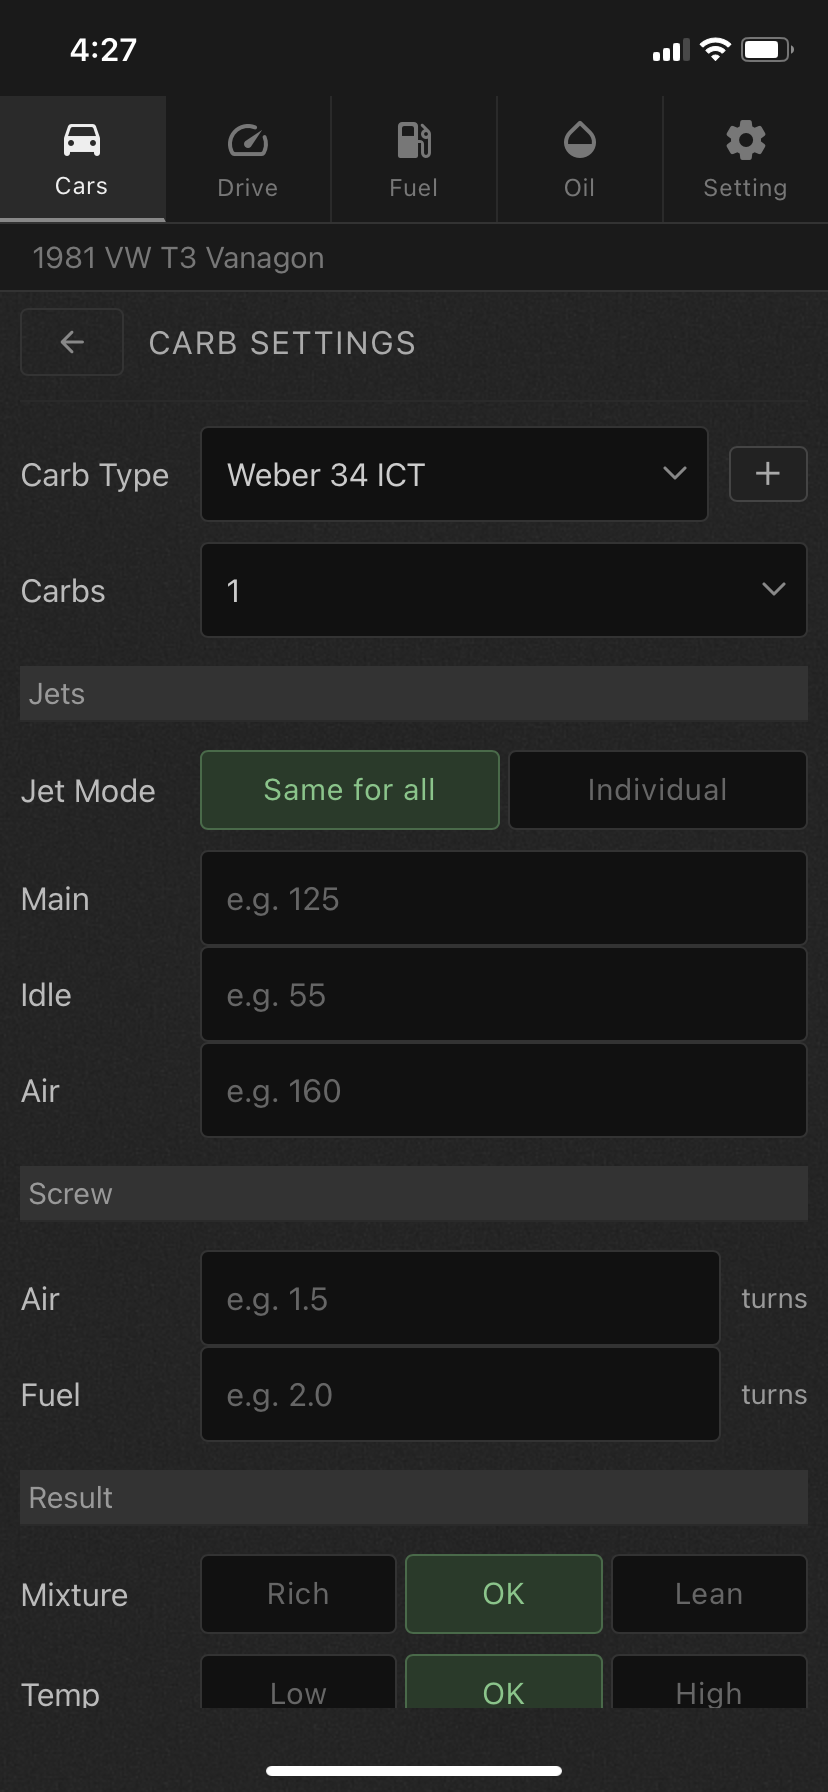
Choose the carb type (dropdown, or add one with “+”) and set the number of carbs (1–8). Jet sizes can be set as “same for all carbs” or “individually,” supporting multi-carb setups.
Record the turns for the air and fuel screws individually. Enter a baseline setting and the app automatically calculates and displays the change in turns and degrees. Also record the resulting mixture (rich / good / lean) and temperature (low / good / high), plus any notes.

Tuning records list

Tuning record form
Drive
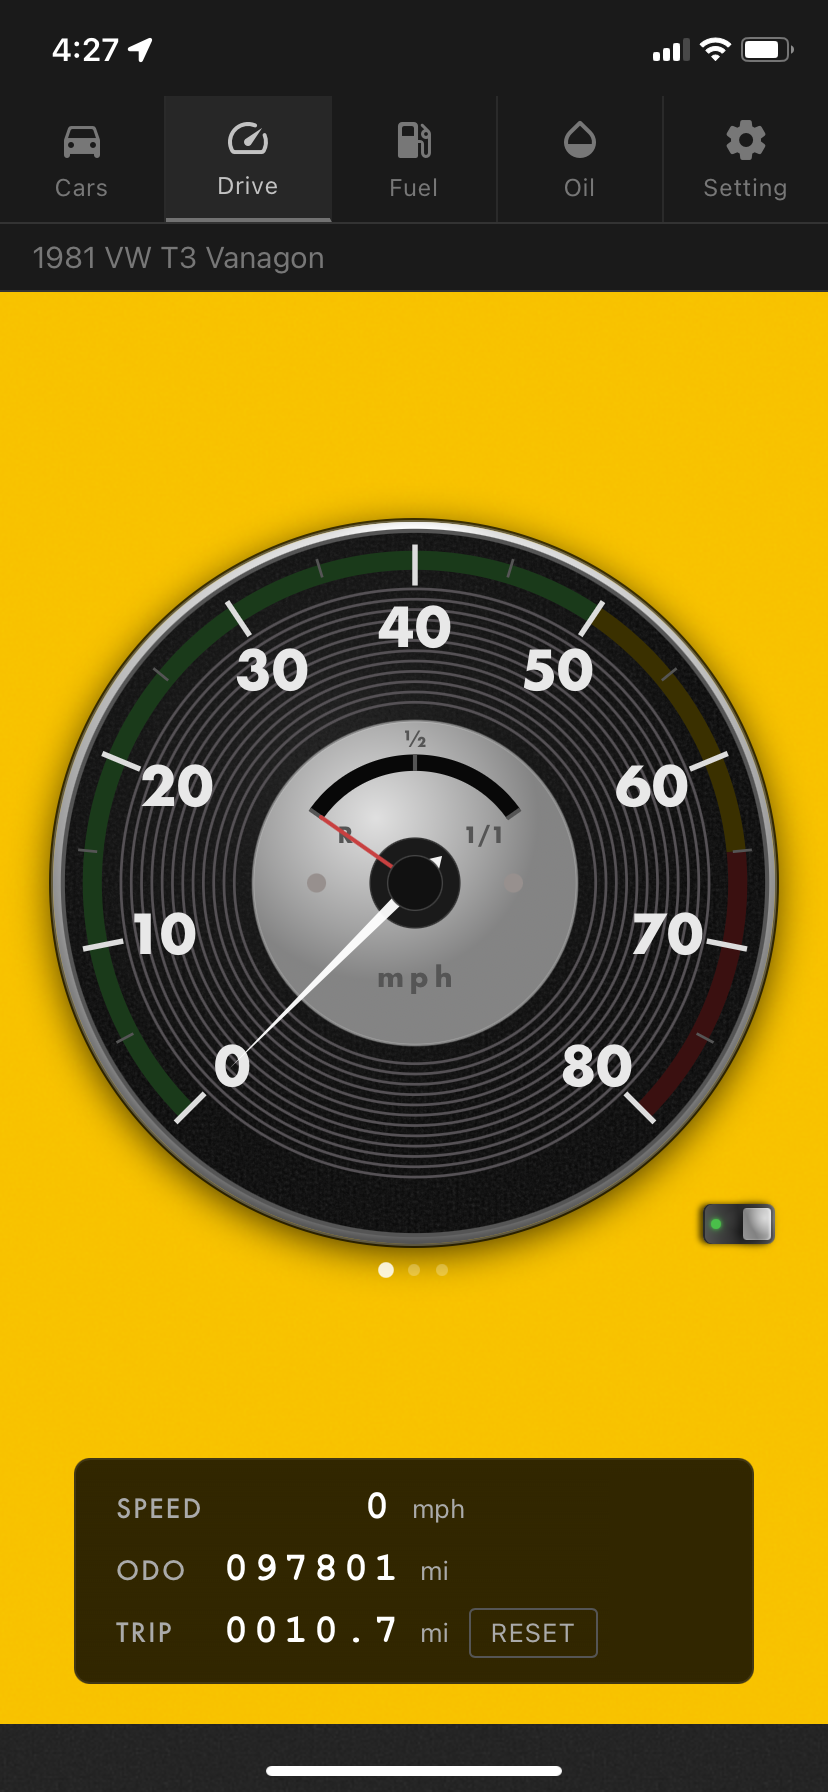
Displays real-time speed via GPS and automatically tracks ODO (total distance) and TRIP (segment distance). With background GPS, tracking continues even while using other apps.
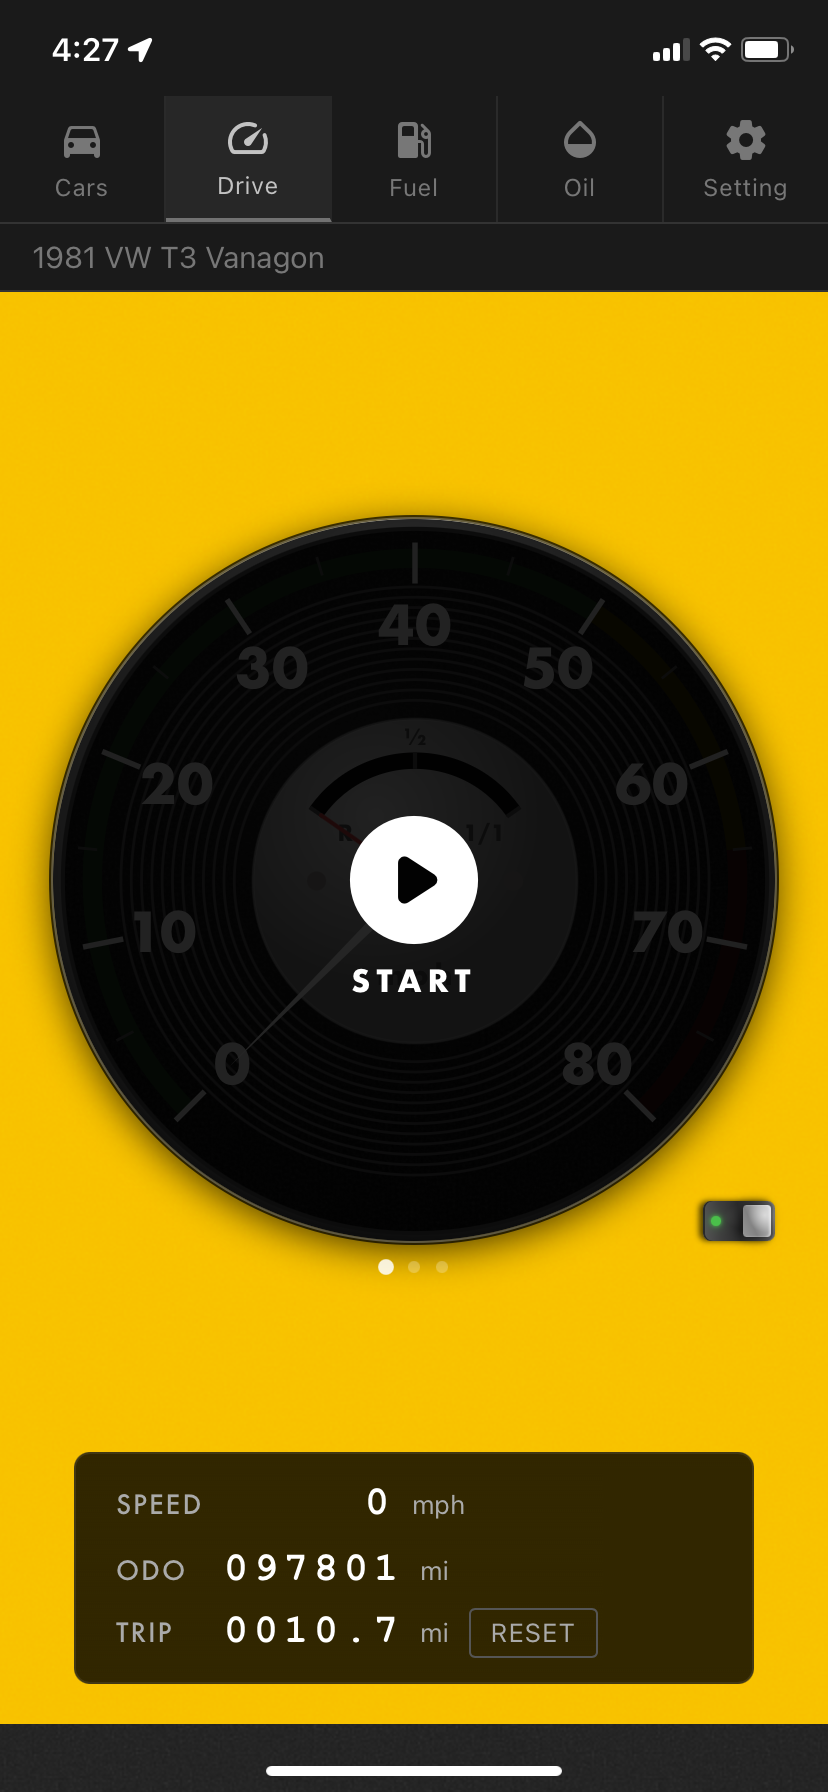
By default, tracking starts automatically whenever the app is open. Turn on “Manual Start/Stop Tracking” in the Settings tab to control tracking yourself with the START/STOP button on the Drive screen.

Drive screen: normal display

Waiting to START (manual mode)
Turning on “Background GPS” in the Settings tab keeps tracking distance even when the screen is off or you're using another app (like navigation or music). When off, tracking only happens while the Drive screen is open.
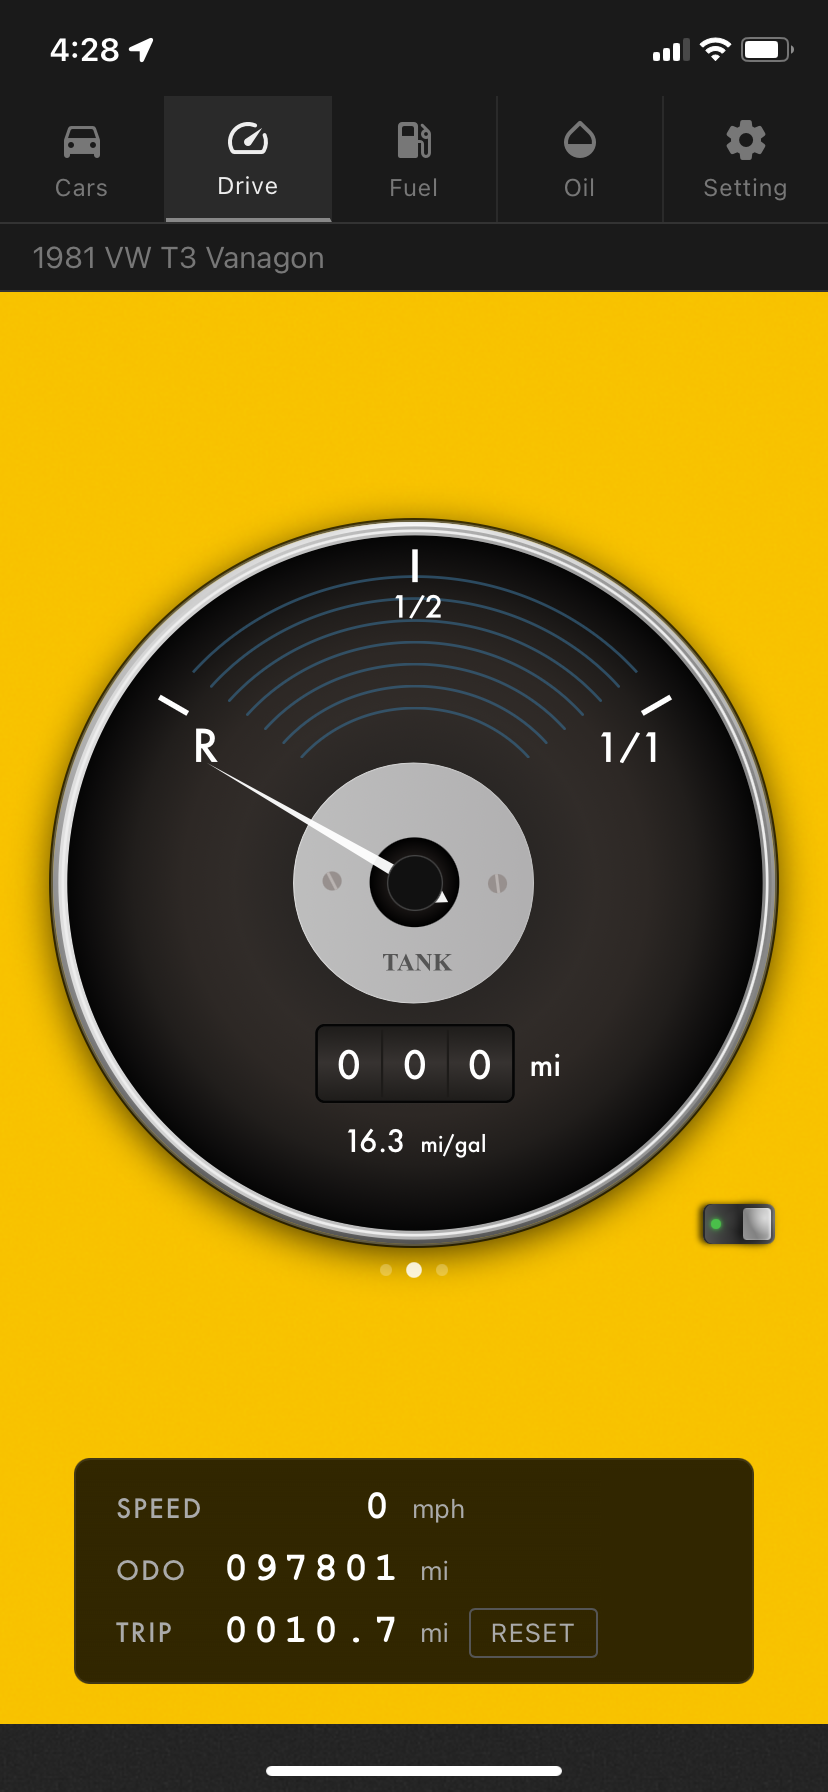
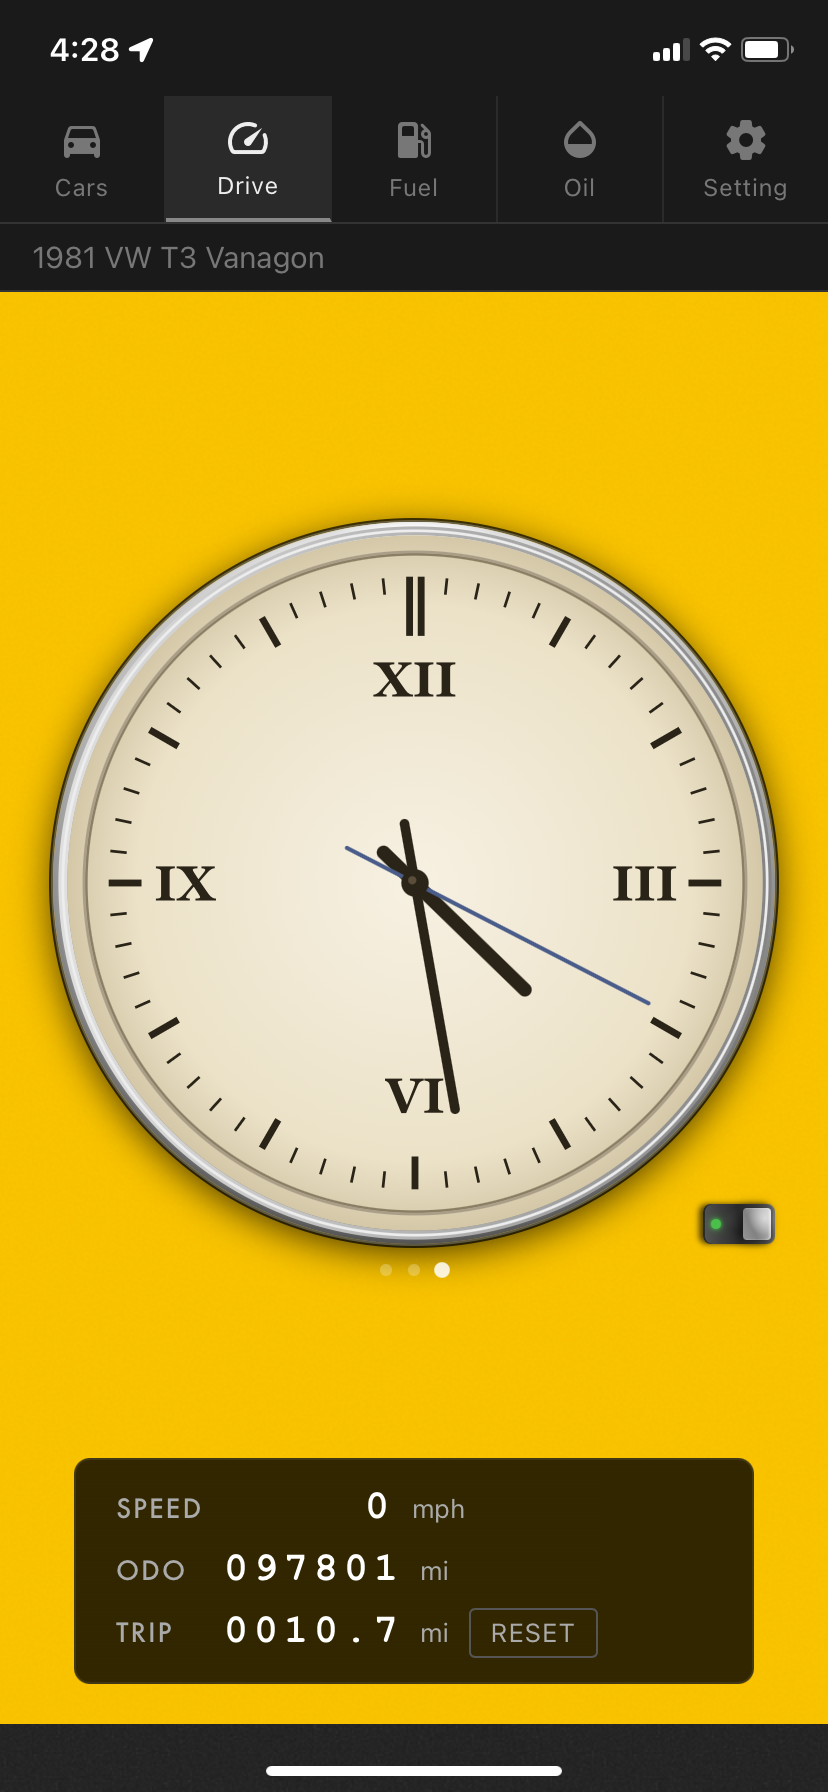
The meter dial has three display modes. You can switch between them by swiping left or right on the meter. The dots at the bottom indicate the current mode.

Fuel gauge mode

Clock mode
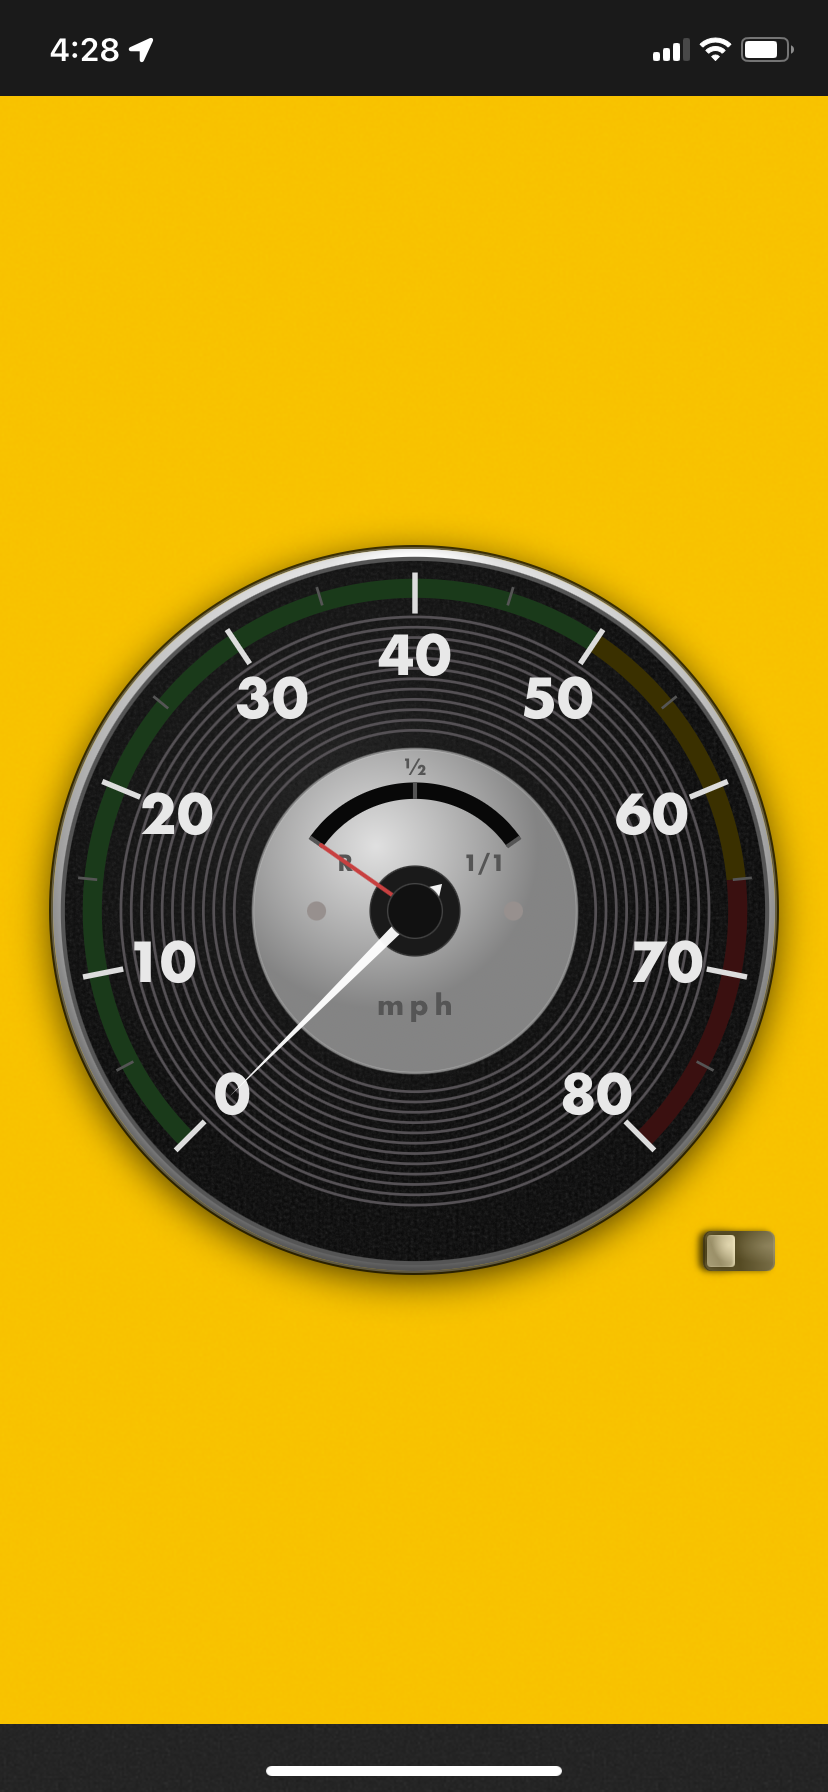
Flip the switch in the bottom-right of the meter to enter immersive mode, showing the meter alone in full screen — great for visibility while driving. Tap again to return to the normal view.

Immersive display
The app supports a custom URL scheme starting with “vcmonitor://”. Write this URL to an NFC tag and place it on your dashboard, and tapping your phone against it will automatically open the specified screen — handy for starting tracking the moment you get in.
URL for each screen
| URL | Opens |
|---|---|
| vcmonitor://cars | Cars (vehicle management) |
| vcmonitor://drive | Drive (speedometer screen) |
| vcmonitor://fuel | Fuel (fuel tracking) |
| vcmonitor://oil | Oil (oil change records) |
| vcmonitor://setting | Settings |
| vcmonitor://stop | Stop measuring and save the trip |
Opening a specific vehicle
Add ?car=VEHICLE_ID after “vcmonitor://drive” to switch to that vehicle before opening the Drive screen. Keep a tag per car and you'll never have to re-select the vehicle when you swap. The URL with the vehicle ID is shown for each car under Setting → Bluetooth Link in the app — just copy it from there.
A tag that ends the trip
“vcmonitor://stop” stops measuring and saves the trip — meant for tapping as you get out. Nothing happens if you tap it while no trip is being measured.
Writing an NFC tag
Writing to an NFC tag isn't a feature of this app itself — you'll need a general-purpose NFC writing app. Write the URL above to the tag as a “URL/URI record.”
When your phone connects to your car's Bluetooth audio, the Drive screen opens as you get in, and the trip ends with the distance reported as you leave. There's no extra hardware to buy — the car audio you already have, or a Bluetooth adapter in the cigarette socket, does the job.
What you need
iPhone setup
Build two automations in the Shortcuts app — one for getting in, one for getting out. First open Setting → Bluetooth Link in the app and tap “Copy” on the URL for your vehicle.
1. Getting in
2. Getting out
Android setup
Open Setting → Bluetooth Link, tap “Select” next to a vehicle and choose one of your paired devices. That's all — no shortcuts to build. Getting in, you receive a notification; tap it to open that vehicle's Drive screen.
Notifications
When the trip ends as you leave, you get “Trip recorded (12.3 km) — nice drive!” — nothing to set up. Ending a trip yourself with the STOP button shows the result on screen, so no notification is sent.
Stopping for fuel along the way
The distance so far is recorded and the trip ends. Press START again when you set off. Measuring only ever begins when you press START, so there is nothing to second-guess.
Fuel
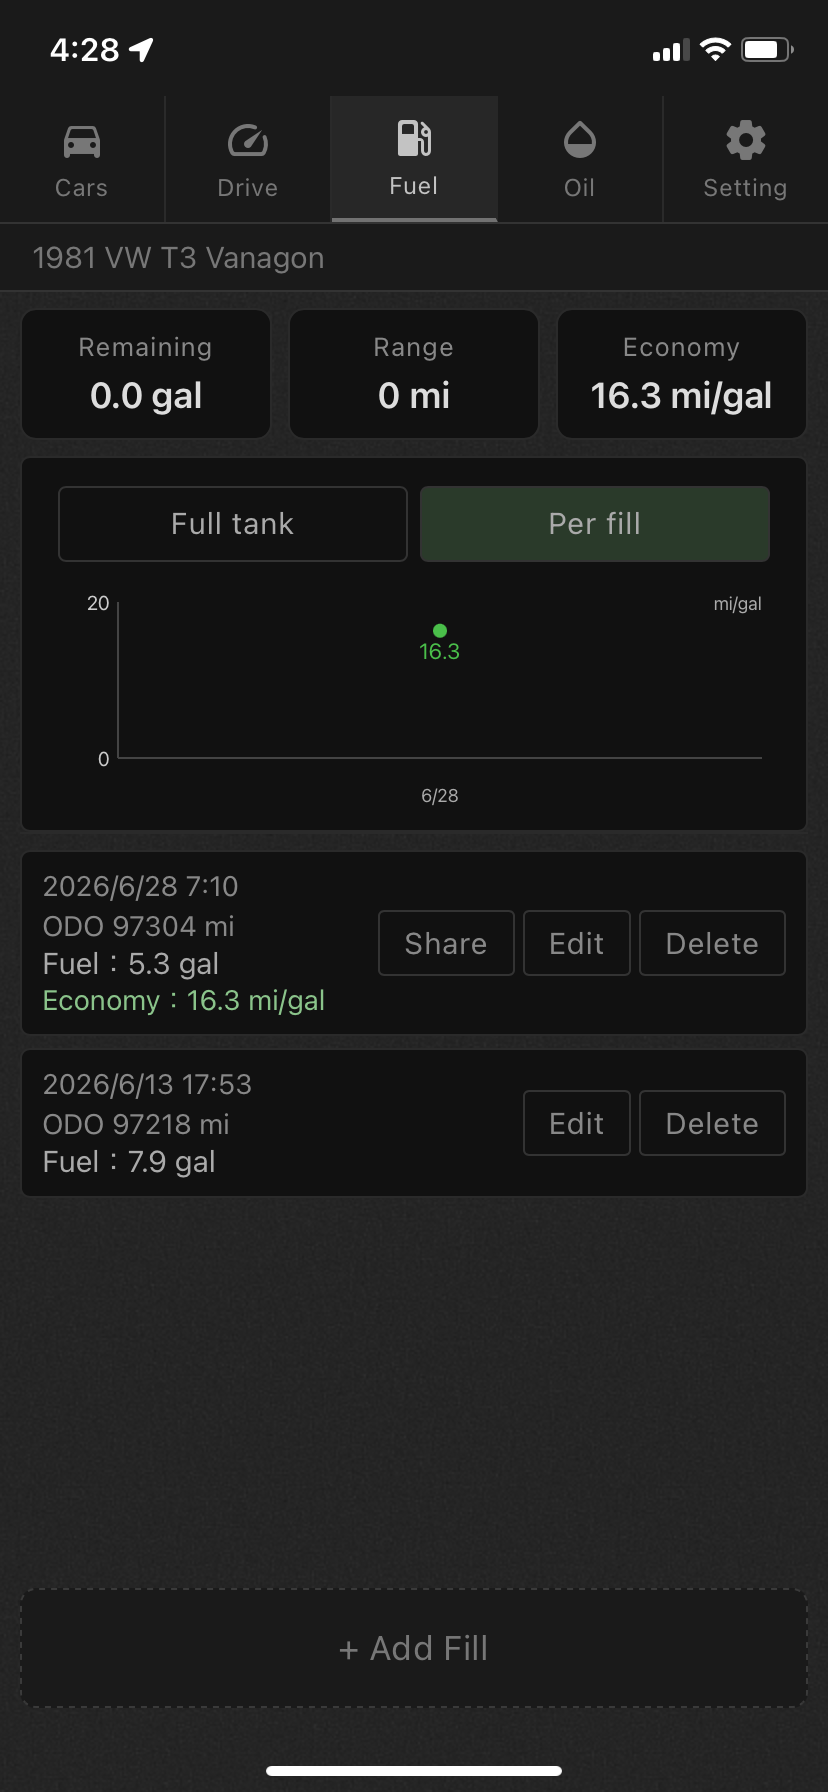
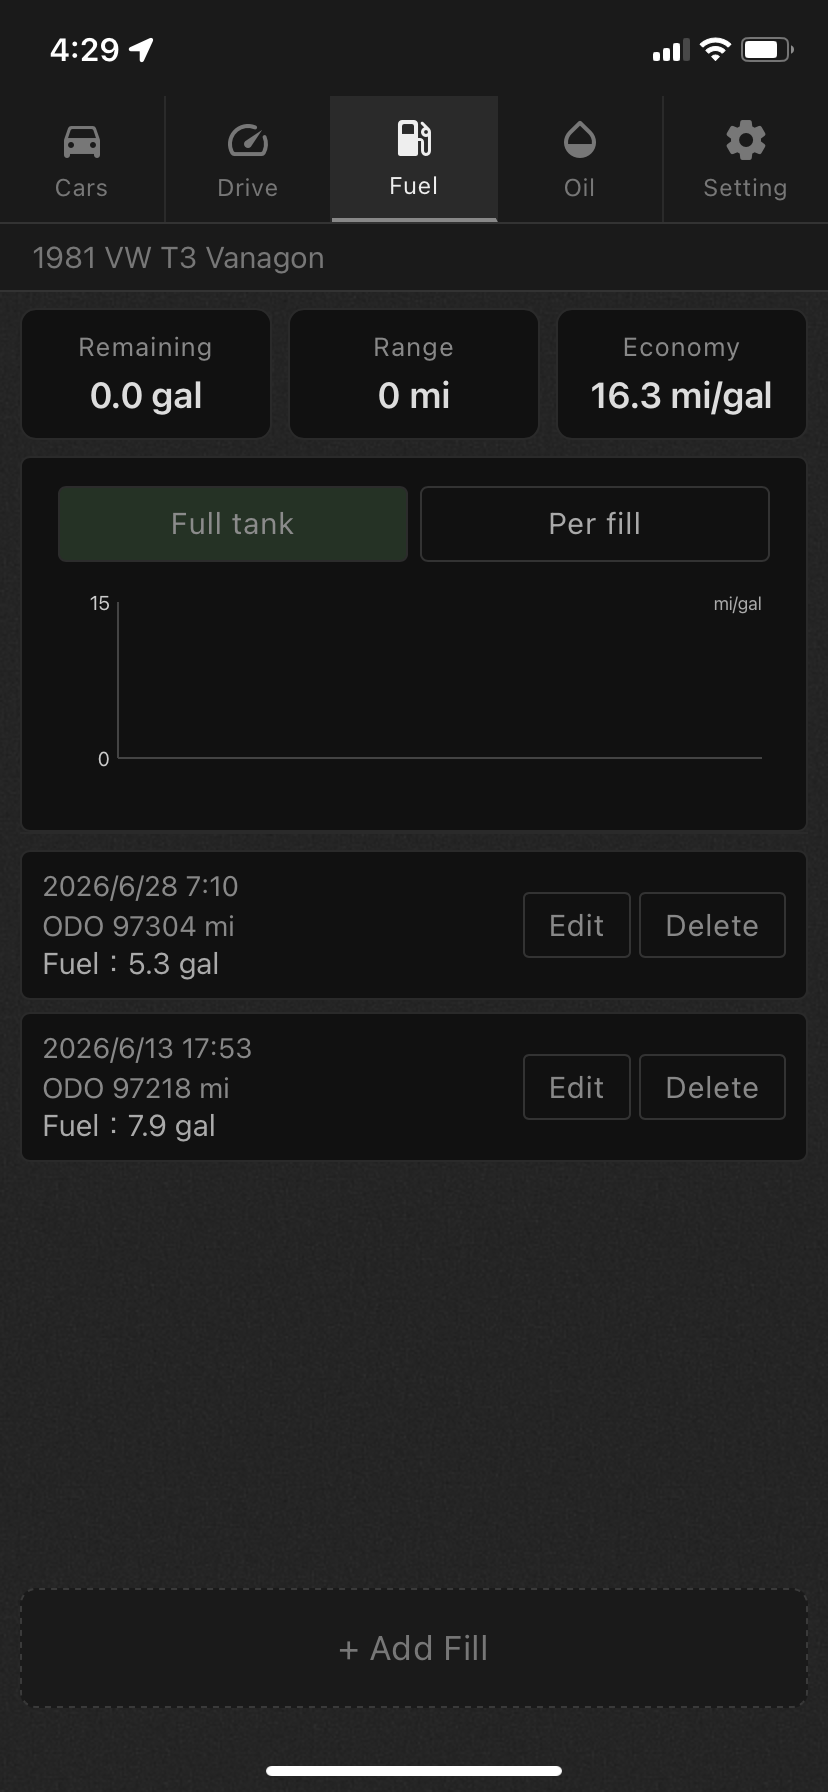
Just log the amount and mileage every time you fill up, and the app automatically calculates estimated remaining fuel, range, and average economy — solving the “how much farther can I go?” question for vintage cars with smaller tanks.
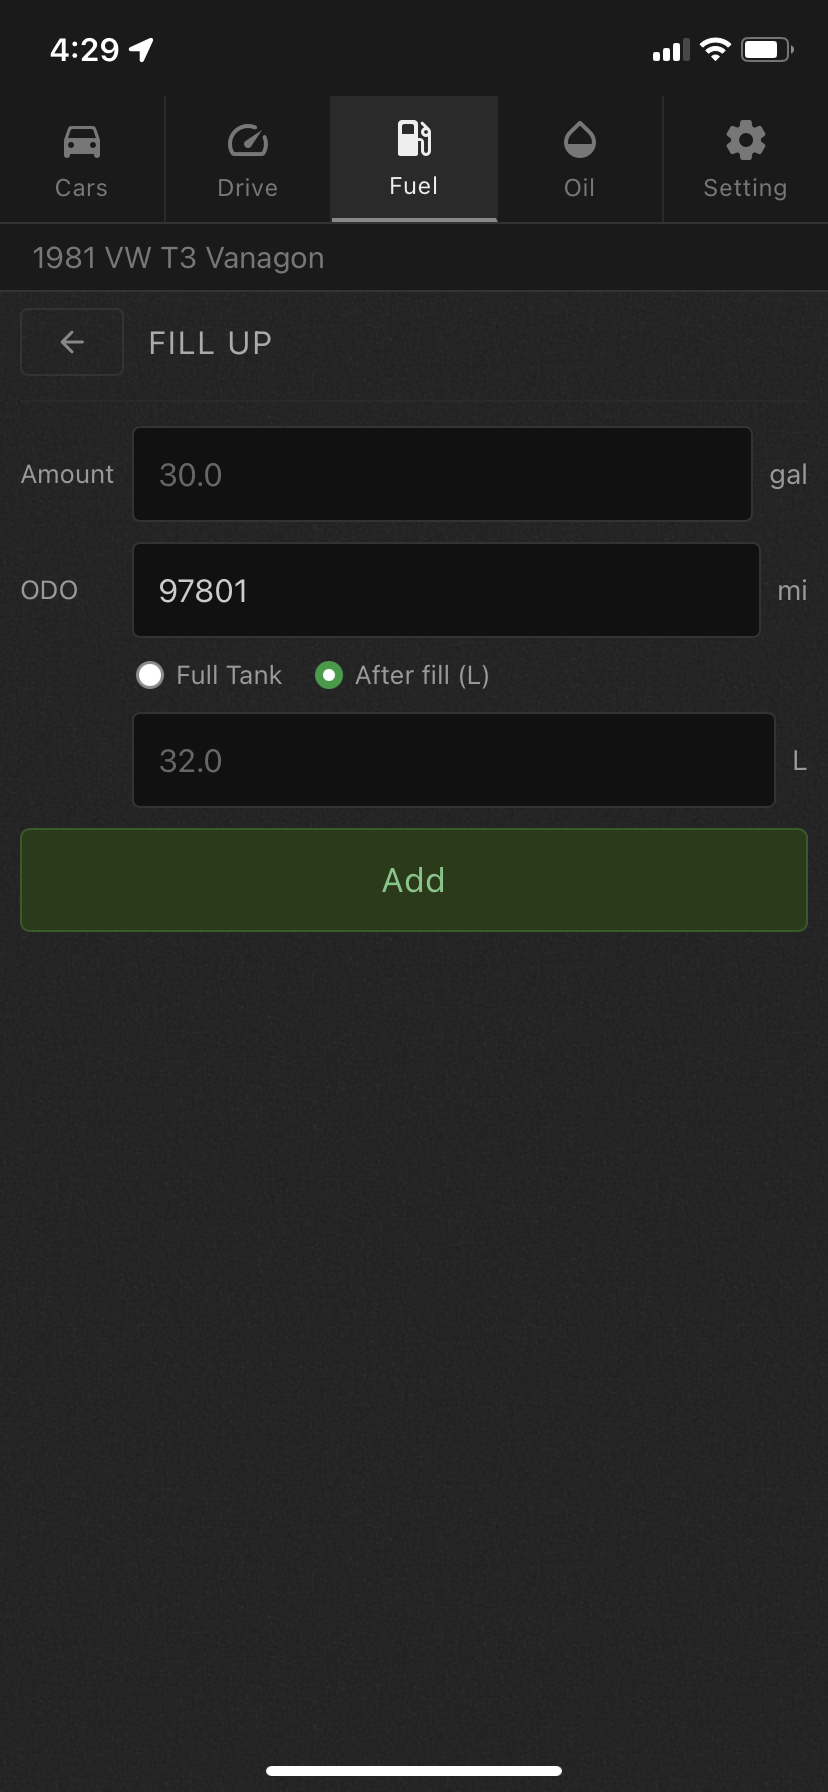
Enter it from “+ Add Fill-up” in the Fuel tab. Supports both “filled to full” entries and entries where you know the “remaining fuel after filling.”

Fill-up history + stats

Fill-up form
Once you've logged enough fill-ups, you can view your fuel economy trend as a graph. Switch between “full-tank method” and “interval economy.” Units can be switched between L/gal in the Settings tab.

Fuel economy chart
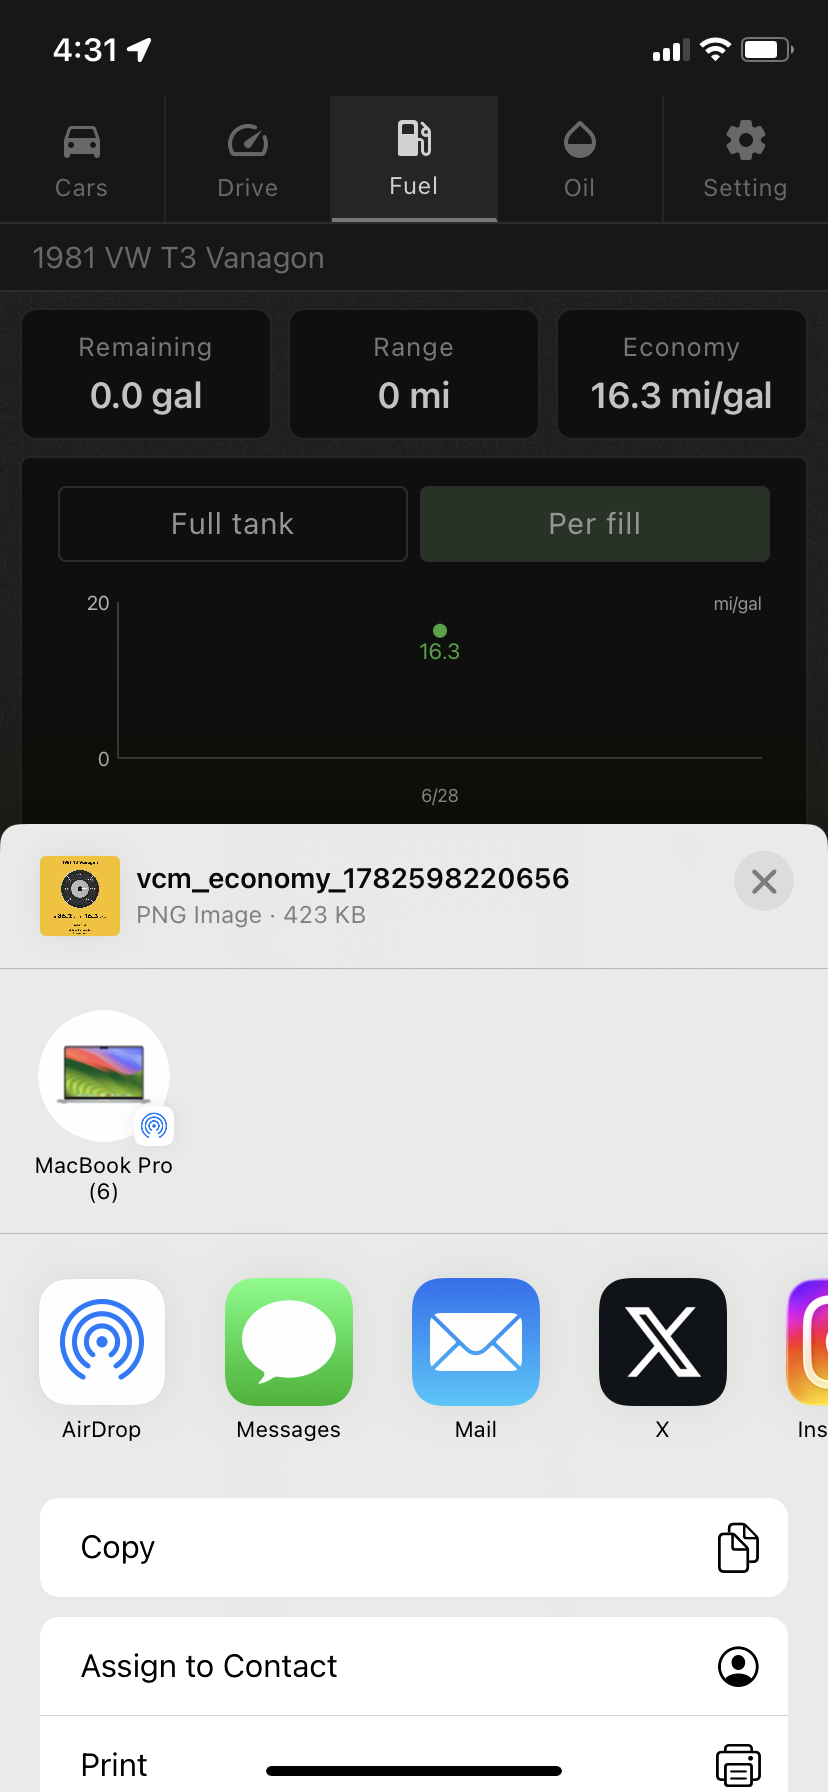
A “Share” button appears on any fill-up record where fuel economy was calculated. Tap it to generate a meter-styled image card summarizing that record's fuel economy and distance, then share it or save it via the standard share sheet.
The card's background color uses the custom color you set when registering the vehicle, so your car's personality carries right through into the image.

Fuel economy share card
Oil
Log the date, mileage, brand, and viscosity together in one place. Oil management matters especially for air-cooled engines. Set a reminder interval so you never miss the next change.
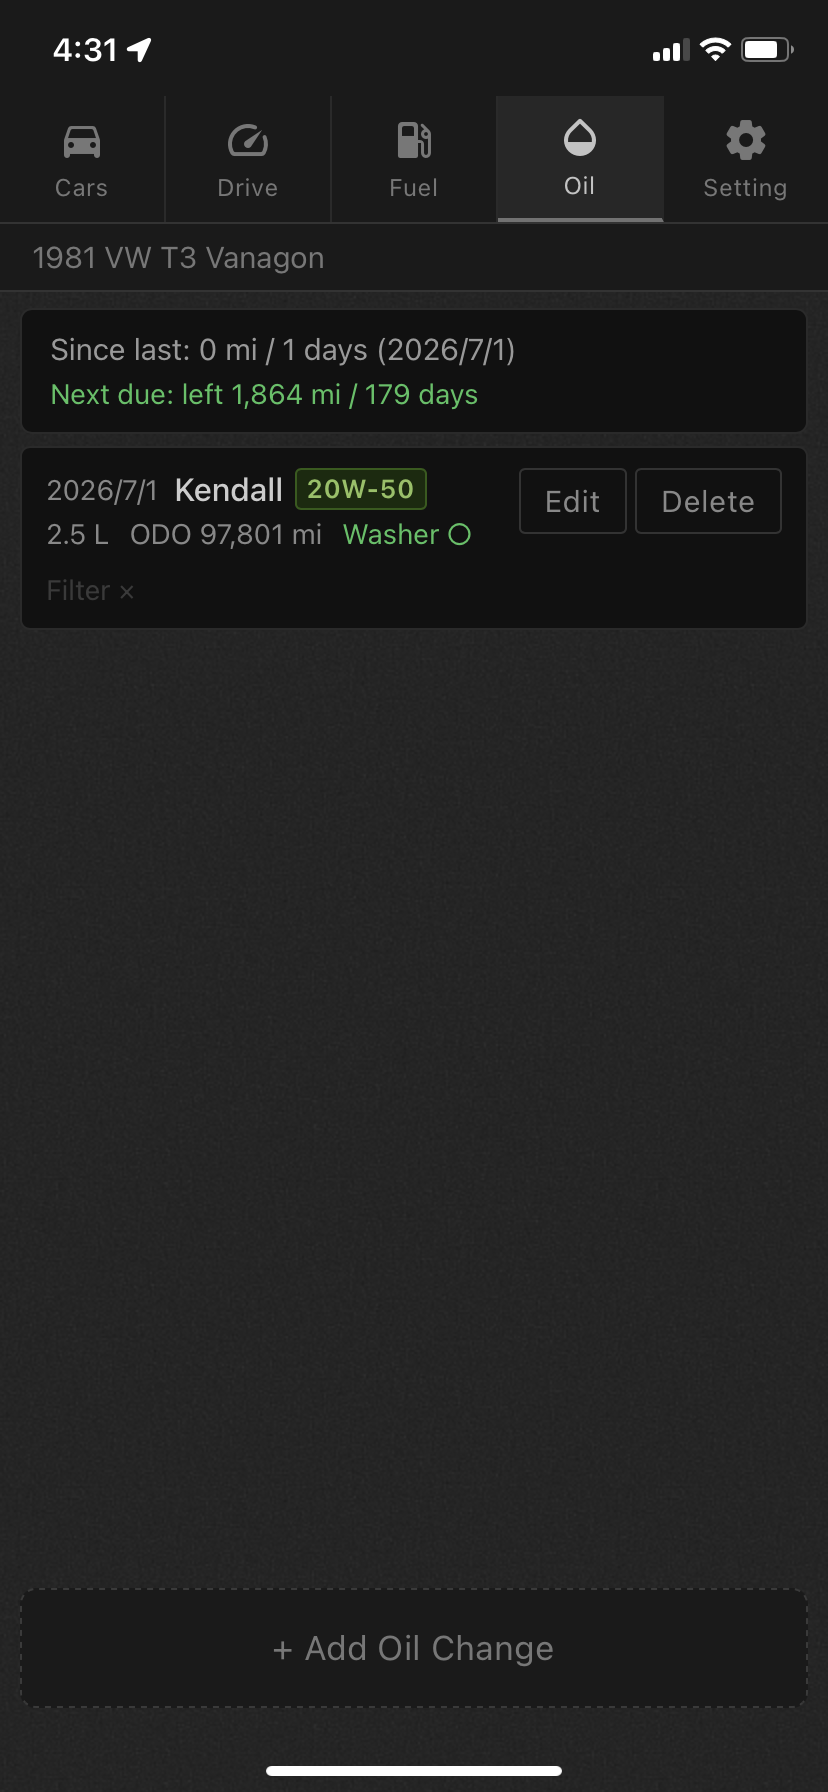
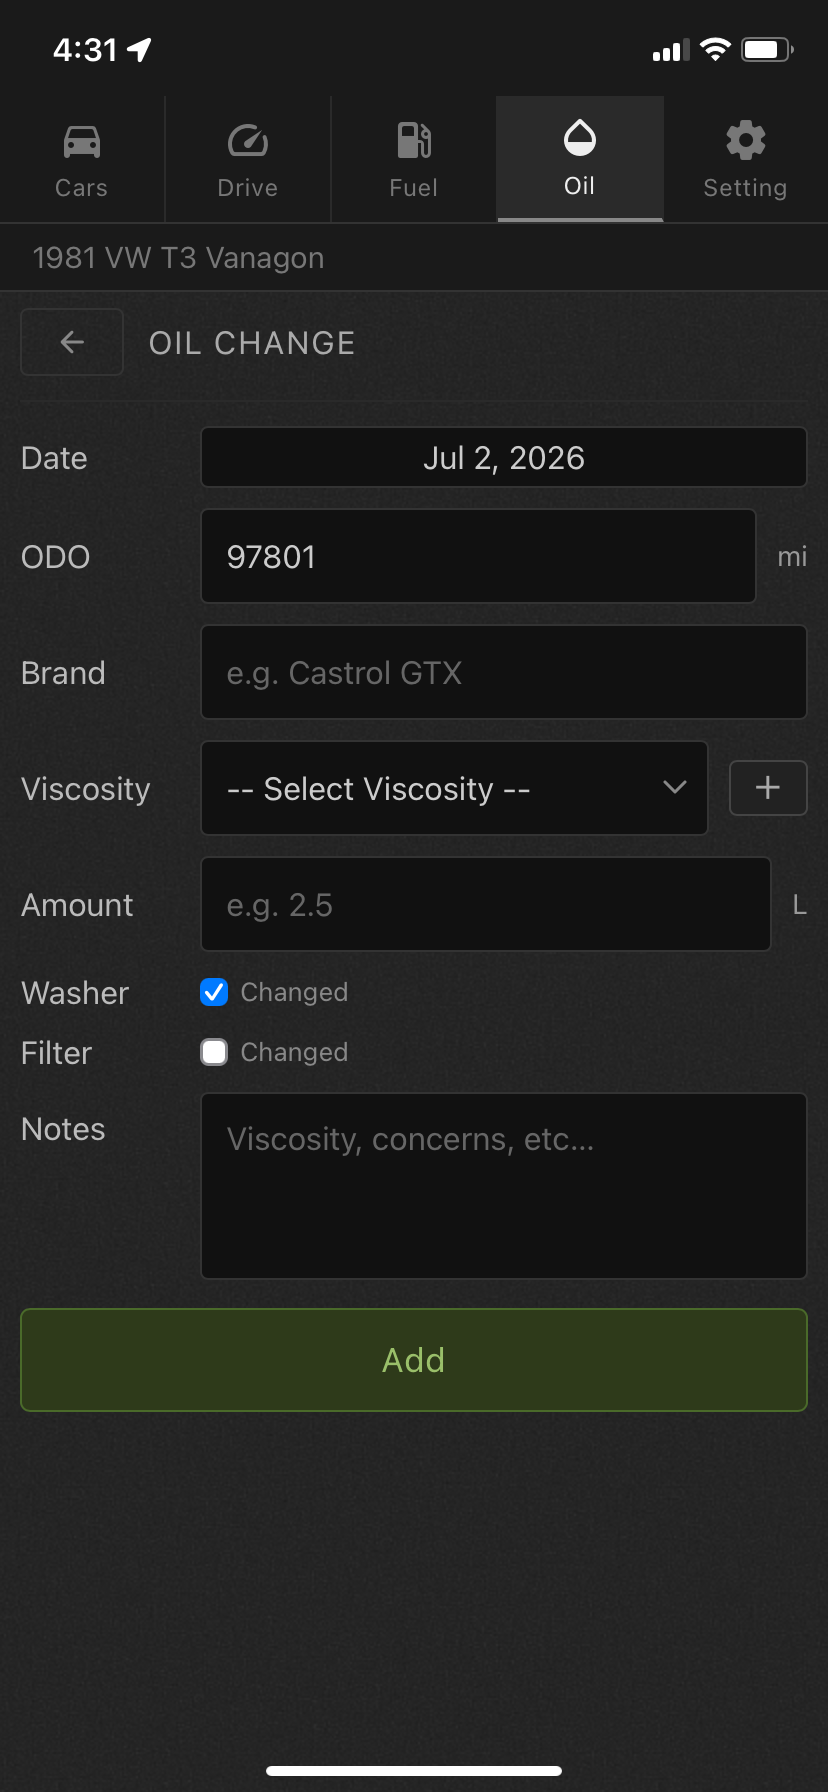
Enter it from “+ Add Oil Change” in the Oil tab. Along with brand, viscosity (dropdown, or add one with “+”), and amount, you can also check off whether the gasket and filter were replaced.

Oil change history

Oil change form
Based on the “oil change interval” (distance / time) you set when registering the vehicle, a reminder appears at the top of the Oil tab as the next change approaches. Use it to avoid missing a change.
Setting
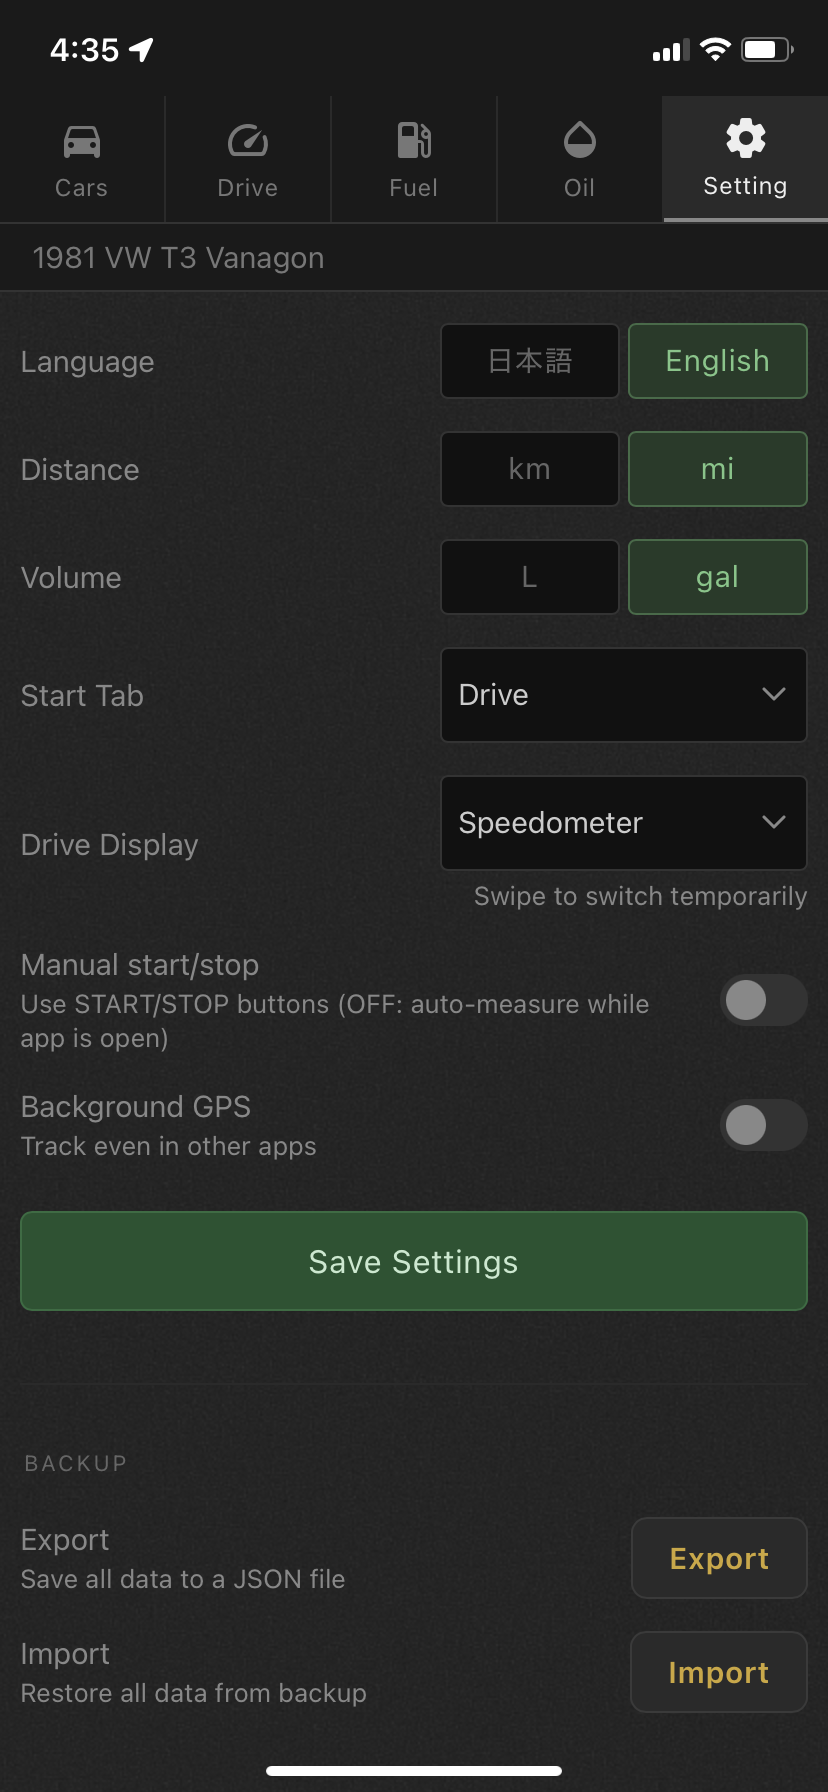
Adjust language, units, startup behavior, and GPS behavior to match how you use the app.
| Setting | Description |
|---|---|
| Language | Switch the display language between Japanese and English |
| Distance | Switch the distance unit between km and mi |
| Volume | Switch the fuel unit between L and gal |
| Start | Choose which tab opens when the app launches (Cars/Drive/Fuel/Oil) |
| Drive Display | Set the Drive screen's default display mode (speedometer / fuel gauge / clock). Can be switched temporarily by swiping while driving |
| Manual Start/Stop Tracking | When on, control tracking with the START/STOP buttons. When off, tracking starts automatically while the app is open |
| Background GPS | When on, tracking continues even while using another app or with the screen off |
| Night Mode | After dark, light the gauges with a warm bulb glow. Choose how it switches (automatically or by times you set) and how strong the light is |
After dark, the gauges shift to a display lit by a warm bulb glow. It recreates how a vintage instrument cluster looks at night under a small bulb: the orange is strongest at the rim of the dial and fades towards the centre. The numbers and the needle keep their own brightness, so nothing becomes harder to read.
Turn on “Night Mode” in the Settings tab and the options below appear.
| Option | Description |
|---|---|
| Switching | Automatic — works out sunset and sunrise from your GPS position and switches on its own. Set times — switches during the hours you enter in “Start” and “End” below. |
| Schedule | Shown when “Automatic” is selected: the times the gauges are due to light up and go back to normal today (read-only). Until the app has had a position fix it reads “Locating” and switches by your “Start” and “End” times instead. |
| Start / End | Shown when you choose “Set times”. A range that crosses midnight, such as 18:00–06:00, works fine. |
| Light level | Low / Normal / High. The stronger the light, the further it reaches across the dial and the deeper the orange. |
Use “Backup” at the bottom of the Settings tab to export all your data (vehicle info, trip logs, fuel records, tuning records, maintenance records, and more) as a JSON file. When switching phones or reinstalling the app, restore your data by loading that file with “Import.”

Backup
Data
Trip logs, fuel economy, and maintenance records are all stored on your device only, and are never sent anywhere else.
See our Privacy Policy for details.
FAQ
No. Sunset and sunrise are calculated from the position your GPS reported and the device clock. Nothing is requested from a server, so it works with no signal and in airplane mode.
Once a position has been obtained it is stored on the device and reused from then on. If the app has never had a position fix, it falls back automatically to the hours you set in “Start” and “End”.
Out of signal range, GPS cannot use network assistance, so the first fix may take longer. Until it arrives the app switches by time, then moves to automatic once the position comes in.
If “Switching” is set to “Automatic”, check that location permission is granted. Without a position fix the app switches by the times you set instead (18:00–06:00 by default).
To match your own hours, choose “Set times” under “Switching” and enter the “Start” and “End” times you prefer.
The GPS speedometer and ODO/TRIP calculate speed and distance from GPS signal. Depending on reception — in tunnels or dense urban areas, for example — there may be some error or delay compared to actual speed/distance.
Check that your device's location setting is set to “Always Allow.” Depending on the device, you may also need to exclude the app from battery optimization in your OS settings — check your device's manual for details. Note that if the OS force-quits the app, tracking can't continue during that time (this is a platform limitation).
Shortcuts builds its list of actions when it launches, so an app you have just installed or updated may not be in it yet. Quit the Shortcuts app and open it again. Note that this action requires iOS 16 or later.
Check whether your Bluetooth device stays powered after you switch the engine off. In a socket that stays live the connection never drops, so the trip never ends. Use a socket wired to accessory power.
Check whether Do Not Disturb is switched on. While it is, several notifications are bundled into one, and tapping it may not open the app.
Open Settings → Apps → Vintage Car Monitor → Notifications → “Bluetooth link” and turn on “Pop on screen” and “Override Do Not Disturb”. This notification will then appear on its own even during Do Not Disturb, and tapping it opens the Drive screen.
The wording varies by device — “Override Do Not Disturb” may be shown as “Priority notifications”.
That is iOS letting you know an automation ran; it does not come from this app. It is worth keeping — it tells you the automation fired even when the phone stays in your pocket. If your automation offers a “Notify When Run” option you can switch it off, though it is not shown on every version of iOS.
Select a vehicle from the list in the Cars tab, and Drive, Fuel, Oil, Tuning Records, and Maintenance will all reflect that vehicle from then on. ODO/TRIP, fuel records, tuning records, and maintenance records are all stored independently per vehicle.
Yes, reinstalling clears the data stored on your device. Export a backup from “Backup” in the Settings tab beforehand, then import it after reinstalling to restore your data. We recommend the same steps when switching to a new phone.
No — all data is stored on your device only, with no automatic transmission or backup to external services. Backups must be created manually via export/import.